Introduction↑
The naval war of World War I was a conflict unlike any previous one with the exception of the brief Russo-Japanese War (1904-1905). Throughout most of the Age of Sail from the 17th century to the mid-19th century, technology, tactics, and life at sea had changed little. The close of the Napoleonic Wars in 1815, however, to 1914 was a period of technological change that transformed warship design and consequently most aspects of naval war.
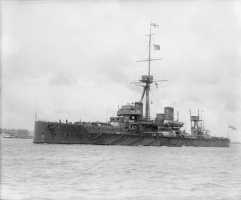
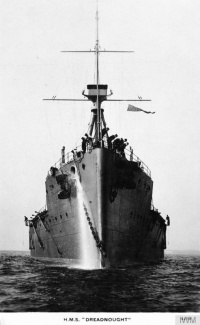
By 1914 these technological innovations produced far more powerful and capable warships than those of the Age of Sail. The core of the battle fleet was the all-big-gun dreadnought battleship, first introduced in 1906 with the launch of HMS Dreadnought by the British. Some fleets also incorporated battle cruisers, being vessels possessing battleship-sized armament mounted on a hull that sacrificed armor protection for the sake of greater speed. Among other classes of ship were smaller cruisers to perform not only reconnaissance, but also protect and raid commerce. The advent of the torpedo produced first torpedo boats and then larger torpedo boat destroyers. Finally, the new technology yielded submarines armed with self-propelled torpedoes. The major powers mostly viewed these vessels as suited primarily for reconnaissance.
Upon the outbreak of the war, most of the naval force of the belligerents rested in the fleets of Great Britain and Germany. The two nations had been locked in a naval race since 1898 when Germany embarked on the construction of a blue water navy that Britain viewed as a threat to its far-flung imperial interests around the globe. By 1914, the British Royal Navy was the largest in the world. It comprised twenty-two dreadnought battleships (an additional thirteen were under construction), nine battle cruisers (an additional one was under construction), forty older pre-dreadnoughts, 121 cruisers of varying types, 221 destroyers, and seventy-three submarines. The German High Seas Fleet was numerically inferior to the British Navy. It comprised fifteen dreadnought battleships (an additional five were under construction), five battle cruisers (three more were under construction), twenty-two pre-dreadnoughts, forty cruisers, ninety destroyers, 115 torpedo boats, and thirty-one submarines.
The other belligerent powers had lesser naval forces that they utilized in the conflict. In terms of the other Allied powers, France possessed four dreadnoughts, six semi-dreadnoughts, fourteen pre-dreadnoughts, twenty-eight cruisers, eighty-one destroyers, and seventy-five submarines. Russia’s fleet, being split between the Baltic and Black Seas, comprised ten pre-dreadnoughts, ten cruisers, twenty-five destroyers, and twenty-two submarines. Italy’s force in 1914 (although they did not declare war as an Allied power until 1915), centered on three dreadnoughts, eight pre-dreadnoughts, twenty-one cruisers, thirty-three destroyers, and twenty-two submarines. The other Allied powers were non-European, being Japan and the United States. The Japanese force in August 1914 counted two dreadnoughts, one battle cruiser, ten pre-dreadnoughts, thirty-three cruisers, fifty destroyers, and twelve submarines. The United States, while not a belligerent power until 1917, possessed a sizable force at the outbreak of the war. It comprised ten dreadnoughts, twenty-three pre-dreadnoughts, thirty-four cruisers, fifty destroyers, and eighteen submarines.
The naval forces of Austria-Hungary and the Ottoman Empire, being the other Central Powers with naval forces, were substantially weaker than those of the Allied powers. In 1914 Austria-Hungary operated three dreadnoughts, three semi-dreadnoughts, six pre-dreadnoughts, seven cruisers, eighteen destroyers, and five submarines. The naval force the Ottoman Empire consisted of two pre-dreadnoughts, two cruisers, and eight destroyers.
In sum, the naval forces of the Allies were far greater than those of the Central Powers. Even so, World War I proved a contest where naval force exercised by both the Allied Powers and the Central Powers had a great impact on the course of the war.
The Surface War in the North Sea and Atlantic Ocean, 1914-1918↑
↑
Most of the naval operations in World War I unfolded in the North Sea and Atlantic Ocean between Great Britain and Germany. The contest between these two powers proved not to be the one envisioned by the naval planners of either side at the outbreak of the conflict. The strategies of both sides rested in part on the idea that a decisive fleet encounter between the powers would decide the war at sea. That view was a product of the writings of Alfred Thayer Mahan (1840-1914). In his Influence of Sea Power on History, Mahan emphasized the need for the construction of battle fleets based on battleships to destroy an enemy force. The strategies produced by the two powers to achieve this end, however, worked against such an occurrence.
The British started planning for a possible war with Germany as early as 1901 when they began to examine the threat to their commerce posed by German surface raiders. Subsequent examinations of the possible German threat produced a strategy in 1908, that called first and foremost for the destruction of the German battle fleet. The core element of this plan was the implementation of a naval blockade of Germany to both cut off its overseas commerce and deny supply through neutral European powers by seizing contraband of war that could be re-shipped to Germany on neutral vessels. Specifically, the 1908 plan called for a close blockade of Germany. This practice entailed the deployment of naval units close to the entrances of Germany’s ports to control all commercial traffic. British naval officials hoped that a close blockade would force the Germans to sortie their fleet in an attempt to break the blockade and thus stave off economic ruin. They assumed that their fleet’s numerical superiority would result in victory through a decisive fleet action.
The British altered this plan in the years after 1908 in lieu of the technological advances that produced the self-propelled torpedo and more efficient mines. These weapons held the potential of doing grave damage to a close blockade and thus undermining it without the German High Seas Fleet having to engage in a decisive battle. As a result, by 1914 the strategic plan called for a distant blockade where a force of cruisers would patrol the entrance to the North Sea between the Orkney Islands and the coast of Norway. In concert with this effort the Grand Fleet, the main portion of the Royal Navy was tasked with conducting sweeps into the northern North Sea in the hope of meeting any German force that might sortie to break the blockade. Decisive action versus the Germans remained the centerpiece of British pre-war deliberations on strategy.
The revised British plan greatly decreased the chance of a decisive fleet action given the strategy of Germany. German planning, beginning in 1896, was predicated on the numerical inferiority of the German Navy versus that of the British and sought the same goal of decisive battle. By 1905 German strategy rested on a defense of their major ports against a close blockade through placing the battle fleet in the region of Heligoland Bight and in the principle naval bases of the North Sea. On the outbreak of war, the German Navy would engage British blockading forces largely with torpedo boats and submarines, whittling down their numerical superiority, before engaging the denuded British Royal Navy in a decisive battle for naval superiority in the North Sea. Subsequent deliberations, however, led to many believing that the British would employ a distant blockade rather than a close one. This event would render impossible the attacks envisioned to whittle down the force strength of the British. A satisfactory solution to this problem never materialized. On the outbreak of war, German naval planning was a mixture of directives to deal with both the scenario of a distant blockade and a close one. The plan called for attacks versus a distant blockade by submarines and minelayers while the main elements of the German High Seas Fleet would remain in Heligoland Bight to guard against British raids or attempts to institute a close blockade. Naval officials hoped that both efforts would produce enough British losses to achieve a parity in fleet strength vital to the decisive battle that remained the chief object. As a result, Germany entered World War I with no clearly defined naval strategy.
German naval officials overlooked that in the event Britain instituted a distant blockade they might not send major units of their fleet into the North Sea at all. Such a scenario would condemn the German battle fleet to inaction while Britain retained command of the North Sea. This situation proved to be exactly how the war in the North Sea unfolded, as German forces waited for a massed attack that did not come. The result was very limited surface action that did not produce the decisive contest between battle fleets hoped for by either side. Instead, naval war in the North Sea revolved primarily around the use of smaller naval vessels.
Surface Warfare, 1914-1918↑
The outbreak of war found the British Grand Fleet in command of the sea. The fleet was under the command of Admiral John Jellicoe (1859-1935) and based primarily at Scapa Flow in the Orkney Islands. Additional naval squadrons were in the southern British Isles. Among these was the Channel Fleet of pre-dreadnought and cruisers charged with the defense of the English Channel and for protecting transport to and from the European continent. There was also the Harwich Force comprised of light cruisers and destroyers situated at the naval base of Harwich on Britain’s southeastern coast. Also based at Harwich were two submarine flotillas and a further small force of old cruisers. Assorted lighter forces patrolled the Irish Sea as well as the English Channel.
Opposing these forces was the German High Seas Fleet under the command of Admiral Friedrich von Ingenohl (1857-1933). The main naval bases of the High Seas Fleet were Kiel in the Baltic, and Wilhelmshaven and Cuxhaven in the North Sea. Defenses stationed at the outpost of Heligoland Island protected the latter two ports and guarded the Kiel Canal that led to the former. Other forces lay around the entrances of the Jade, Elbe, and Weser rivers. Many of these guarded Heligoland Bight since Heligoland Island served as an advanced outpost for warning the fleet of any major British sortie into the area.
The first action of the surface war involved light forces of both sides. On 5 August 1914, British destroyers of the Harwich Force engaged and sank the Königin Luise, a passenger ship converted to lay mines, as it tried to mine the approaches to Harwich. Aside from this small engagement there was no surface action as the British between 7 August and 22 August transported the British Expeditionary Force to France as the German Army launched offensive operations against France. The High Seas Fleet did not interfere with this operation primarily since it contradicted German strategy to wear down the British Navy by attrition before launching a decisive battle against it. The result was that the opening of the war was largely a waiting game between the two sides. The Germans launched reconnaissance operations comprised of light forces in August to ascertain the whereabouts of the British Grand Fleet while the British focused on implementing their distant blockade of Germany.
The Battle of Heligoland Bight (28 August 1914)↑
Frustration over the inaction at the opening of the war led to the first pitched engagement between the British and Germans. On 23 August 1914, Commodore Roger Keyes (1872-1945), the commander of Great Britain’s submarine forces, submitted a plan to the British Admiralty that called for an attack on the German naval forces that patrolled in Heligoland Bight. The plan employed surface units and submarines. The surface warships were those of the First and Second Destroyer Flotillas under Commodore Sir Reginald Tyrwhitt (1870-1951). Each flotilla comprised sixteen destroyers and their flotilla leaders, being one light cruiser each. The submarines were those of Keyes’ command. Two battle cruisers under Rear Admiral Sir Archibald Moore (1862-1934) were detailed to cruise in support to the north of Heligoland Island. Included with Moore’s force were the six light cruisers of the First Light Cruiser Squadron under the command of Commodore William E. Goodenough (1867-1945) and three more battle cruisers under the commander of the Grand Fleet’s Battle Cruiser Squadron, Vice Admiral David Beatty (1871-1936).
The attack began shortly before 7:00 am on 28 August 1914 when Tyrwhitt’s surface flotillas engaged the German defenders under Rear Admiral Leberecht Maass (1863-1914), the commander of the Second Scouting Group and senior officer of the High Seas Fleet’s torpedo boats that patrolled near Heligoland Island. Maass’ force comprised nine destroyers on an outer patrol line in the bight, an equal number of minesweepers that lay closer to Heligoland Island, four light cruisers, and two torpedo boat flotillas. The Germans also operated an additional seven cruisers in support, but they were in port at the opening of the engagement.
The heavy fog that lay in the area produced an extremely confusing engagement that hampered the effectiveness of the British attack. The situation deteriorated for the British around 11:00 am as additional German cruisers arrived on the scene. The arrival of Goodenough’s cruisers helped to offset this threat while Tyrwhitt called for further reinforcement from Beatty’s battle cruisers. These latter warships did a great deal of damage to German forces. By 1:30 pm, the British called off the operation as they became aware of heavier German units en route to the bight.
The arrival of British reinforcements proved decisive and produced a British victory. Two British destroyers and a light cruiser were badly damaged while one German destroyer and three light cruisers were sunk. The tactical triumph was, however, negligible. Defects in British shells that led to failures to detonate on impact lessened German losses. The battle also could have proven a disaster for the British as the Admiralty failed to notify either Tyrwhitt or Keyes of the presence of Beatty’s battle cruisers, which might have been sunk by British ships mistaking them for the enemy. Even so, the battle did have some strategic impact. Wilhelm II, German Emperor (1859-1941), being fearful of additional losses in the future, ordered that the commander-in-chief of the German High Seas Fleet must ask for his consent before committing to a full-scale battle. This order greatly limited offensive operations of the German High Seas Fleet.
From Heligoland Bight to the Battle of Dogger Bank (24 January 1915)↑
By the end of 1914, the strategy of the High Seas Fleet in the North Sea rested on hit-and-run raids against the British coastal towns of Scarborough, Hartlepool, and Whitby in the hope of drawing out and destroying a small portion of the Grand Fleet. The British could not intercept the German raids because the Grand Fleet was anchored too far north. That situation changed after December 1914 when the British deciphered captured German naval code books. These allowed them to learn of all German fleet movements in advance. Combined with this advantage was the transfer of Admiral Sir David Beatty’s Battle Cruiser Squadron to the more southern port of Roysyth on the east coast of Scotland. These two events led to the British intercepting German forces off the Dogger Bank in the North Sea.
In January 1915 Admiral von Ingenohl instructed Vice Admiral Franz von Hipper (1863-1932), the commander of the Scouting Forces of the High Seas Fleet, to patrol the Dogger Bank with a force of three battle cruisers (Seydlitz, Derfflinger, and Moltke), the armored cruiser Blücher, four light cruisers, and eighteen destroyers. The British Admiralty, aware of Hipper's orders, dispatched Vice Admiral Beatty with five battle cruisers (Lion, Princess Royal, Tiger, New Zealand, and Indomitable), seven light cruisers, and thirty-five destroyers to intercept the German force.
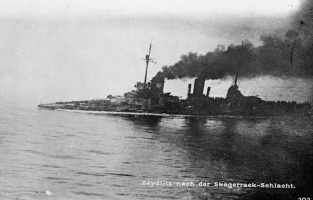
Beatty sighted Hipper at 7:15 am and pursued the German force, which retreated as Hipper realized that he was outgunned. The German squadron, however, could not escape the British owing to the Blücher as it was slower than the German battle cruisers. As a result, Beatty closed the range and opened fire. In the ensuing engagement both Blücher and Seydlitz (Hipper’s flagship) were heavily damaged, but the British performance suffered from Beatty’s communications being misunderstood by his commanders. This resulted in unequal fire distribution for the British.
Meanwhile, Hipper’s order to concentrate fire on Beatty’s flagship, the Lion, led to damage that slowed the ship and effectively removed it from the battle. Beatty’s attempt to order a pursuit of the enemy’s rear were again misunderstood and led the British force to concentrate solely on the badly damaged Blücher, which sank. The rest of the German force escaped. In exchange for the loss of Blücher, Beatty suffered significant damage only to Lion.
The Battle of Dogger Bank, like the Battle of Heligoland Bight had little strategic impact on the course of the war. It did, however, reveal the superior gunnery of the Germans and led the British to develop improved gunnery techniques. It also showcased the threat posed by cordite fires, being the propellant for firing shells, that could detonate a warship's magazines and destroy the ship as nearly happened to Seydlitz. The Germans subsequently promoted better safety in the handling of these charges. Finally, the battle led to the removal of Admiral von Ingenohl as commander-in-chief of the High Seas Fleet. He was replaced by the more cautious Admiral Hugo von Pohl (1855-1916), who further restricted the movements of the High Seas Fleet.
From Dogger Bank to the Battle of Jutland (31 May-1 June 1916)↑
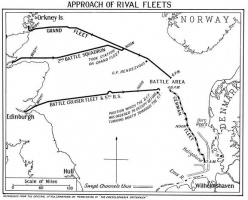
The lack of a decisive fleet action and the increasing threat posed by the British blockade led the Germans to conduct a counter-blockade against British commerce through the use of submarines in an attempt to force Great Britain from the war. As a result, there was little surface action until after January 1916, when Commander-in-Chief of the High Seas Fleet Pohl died and was replaced by the more aggressive Vice Admiral Reinhard Scheer (1863-1928). In April 1916 Scheer resumed the hit-and-run raids on the British coast with the bombardment of Lowestoft and Yarmouth. On 31 May the High Seas Fleet sortied in hope of luring a portion of the Grand Fleet to a point west of the Jutland Peninsula of Denmark. British intelligence was aware of the operation through knowledge of the deciphered German naval codes. The Admiralty consequently sortied the Grand Fleet, which led to the Battle of Jutland, being the only engagement of the main fleets of the British and Germans in World War I.
The British Grand Fleet under the command of Admiral Jellicoe was, as it had been throughout the war, numerically superior to that of the Germans. It consisted of 151 ships that included twenty-eight battleships, nine battle cruisers, thirty-four cruisers, and eighty destroyers. Admiral Scheer's High Seas Fleet numbered 101 ships that included sixteen battleships, six pre-dreadnoughts, five battle cruisers, eleven cruisers, and sixty-three destroyers.
In keeping with his plan to lure out a portion of Britain's navy, Scheer had separated his battle cruisers under the command of Vice Admiral Hipper from the main force. Hipper was to act as the lure to bring British forces in range of Scheer's battleships that could subsequently annihilate the weaker force. As Hipper steamed north ahead of Scheer, the Grand Fleet moved south with an advance force that included Vice Admiral Beatty's battle cruisers and fast battleships under the command of Rear Admiral Hugh Evan-Thomas (1862-1928). As the British were aware of the German plan, Jellicoe hoped to use this force in much the same way as Scheer had in mind for Hipper.
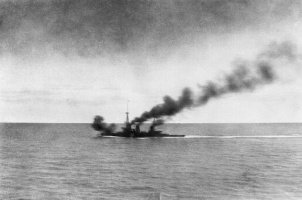
At about 2:30 pm some 100 miles off Jutland the two opposing scouting forces sighted one another. Hipper’s force subsequently turned south with Beatty’s ships in pursuit. Both sides opened fire at 3:45 pm in an opening engagement that proved a disaster for the British. Beatty was without the support of Evan-Thomas’ battleships since his squadron missed a signal to engage the German ships and subsequently fell behind. When Evan-Thomas did enter the battle poor maneuvering largely obviated the use of his force. In addition, superior German gunnery combined with poor armor protection for the battle cruisers took its toll. By 4:26 pm both the battle cruisers Indefatigable and Queen Mary were sunk from magazine explosions. Beatty’s flagship, Lion, almost suffered a similar fate if not for quick flooding of the amidships magazines. Beatty then reversed course upon sighting the main body of the High Seas Fleet in the hope that he could lure Hipper and Scheer towards Jellicoe’s force. The German pursuit led at 6:32 pm to the loss of another British battle cruiser, the Invincible.
This triumph meant little for the Germans as they confidently pursued Beatty’s forces. At dusk around 6:30 pm the High Seas Fleet sighted Jellicoe’s battleships steaming in line-ahead formation. The British subsequently crossed the “T” of the German battle line. This allowed for full broadside fire for the British while the Germans could only bring their forward guns to bear. Scheer, realizing that he was outnumbered and outgunned, executed a 180-degree turn to try and retreat with Jellicoe in pursuit. A subsequent 180-degree turn brought Scheer once more under Jellicoe’s fire, but a further reversal of course allowed him to slip away during the night as his destroyers launched torpedo attacks to cover his retreat. While there were many individual ship actions during the night of 1 June, Scheer succeeded in withdrawing most of his force.
The Battle of Jutland proved a huge disappointment for both sides as it was not the decisive engagement that naval officials had envisioned. Even so, the Germans proclaimed the Battle of Jutland (or the Skagarrak as they labelled it) a victory for the High Seas Fleet. In terms of overall losses, this was indeed the case. The British lost fourteen vessels: three battle cruisers, three cruisers, and eight destroyers. They also suffered 6,094 casualties. The Germans lost eleven ships, being one battle cruiser, one pre-dreadnought, four cruisers, and five destroyers in addition to 3,058 casualties. The British Admiralty, on the other hand, was at first dismissive of the battle amidst accusations that Jellicoe was too cautious in the engagement and thus allowed the Germans to escape. Such criticism led to his removal as commander-in-chief of the Grand Fleet in December 1916 in favor of Vice Admiral Beatty.
In truth, despite its failure to be a decisive battle, Jutland was indeed important. The engagement ranks as a strategic defeat for the Germans despite the losses they inflicted on the British. The High Seas Fleet had been forced to retreat while the British Grand Fleet retained command of the sea and the economic blockade of Germany. In addition, the Battle of Jutland inflicted such material damage to the High Seas Fleet that it was incapable of putting back to sea for months.
From Jutland to the End of the War↑
In the wake of Jutland, the Germans never risked the High Seas Fleet in an open battle again, although it did sortie in August and October 1916. The surface fleet remained largely inactive in 1917 in favor of the German submarine war against the Allies. The only actions were the German Zeebrugge raids in February, March, and April where destroyers from Ostend and Zeebrugge sortied into the English Channel to try to disrupt troop and supply movements. The engagements, however, were ineffective. The entry of the United States into the war as an Associated Power of the Allies on 6 April 1917 further increased the numerical disparity between Germany and the Allied powers and added to the inaction in the surface war. The last major operation proved to be the 22-23 April 1918 Ostend and Zeebrugge raids by the British in an attempt to deny these ports to German submarines and destroyers.
By this point, the German High Seas Fleet was in an increasing state of collapse. Its morale had plummeted due to its lack of use. The last sortie of the High Seas Fleet was in April 1918 when Scheer steamed up the Norwegian coast in an attempt to destroy Scandinavian convoys bound for Britain. This operation is a reflection of the German strategic shift away from the use of the fleet against surface forces of the British in favor of a war on commerce, primarily through the use of submarines.
By 29 September 1918, General Erich Ludendorff (1865-1937) urged his government to ask for an armistice amidst declining fortunes on land. By this time, the German navy had decisively lost the submarine campaign while the British blockade had damaged Germany’s war effort. In terms of the surface war, the final blow came on 28 October 1918 when the High Seas Fleet mutinied rather than put to sea for a suicidal last assault. The fleet subsequently surrendered to the Allies on 21 November 1918, to be interned at Scapa Flow. It was scuttled there on 26 June 1919 as an act of defiance against the Treaty of Versailles.
The Mediterranean and Black Sea Theaters, 1914-1918↑
Much like the war in the North Sea and the Atlantic, naval operations in the Mediterranean Sea revolved around the use of small craft and ultimately submarines rather than pitched conflict between battle fleets. The opening of the war pitted the naval forces of France and the Austro-Hungarian Empire against one another. The Austro-Hungarians did not wish to seek open battle due to the marked numerical inferiority of their fleet versus that of the French. The first operation of the war consequently was one conducted by Germany. Rear Admiral Wilhelm Souchon (1864-1946), the commander of the German Mediterranean Division, sortied from his base in the Adriatic Sea instead of being potentially trapped there by the French. His force, consisting of one battle cruiser and a light cruiser, steamed for the Dardanelles Straits and arrived in Turkey after eluding a British squadron. These ships were subsequently transferred to the Ottomans, contributed to the Ottoman decision to join the Central Powers on 29 October 1914, and were used to bombard Russian ports in the Black Sea. Strategically, the entry of the Ottoman Empire proved a crucial event since it not only opened another front versus the Russians, but it also closed the supply route to Russia via the Dardanelles and into the Black Sea. Allied attempts to force open the straits and drive the Ottomans from the war resulted in failure. The February-March 1915 Dardanelles Campaign, being an Allied naval operation to open the straits, was unsuccessful at the cost of three battleships. The 25 April 1915 to 9 January 1916 Gallipoli Campaign, an amphibious invasion of the Gallipoli Peninsula with the same goal, also failed at the cost of three more, older battleships.
The Italian entry into the war as an Allied power on 23 May 1915 changed little in terms of operations in the Mediterranean. Admiral Anton Haus (1851-1917), commander of the Austrian navy, sortied in the Adriatic to bombard Italian ports, but mostly the war in the Adriatic revolved around smaller craft as Haus wished to keep his navy as a fleet in being rather than risk it against the preponderance of Allied force in the Mediterranean. There were, however, a few exceptions. The first of these occurred in the context of Bulgaria’s entry into the war as a Central Power in the autumn of 1915. The evacuation of the Serbian Army following a joint Austrian, German, and Bulgarian offensive that overran Serbia led on 29 December 1915 to a raid on the Albanian port of Durazzo by the Austrian navy that cost it two destroyers. Following this, the only other surface engagement was the 15 May 1917 Battle of Otranto Straits when the Austrian Navy disrupted an Allied barrage that attempted to close the straits. Subsequent attempts by the Austrians at more aggressive action under Rear Admiral Miklós Horthy de Nagybána (1868-1957), who assumed command of the navy in March 1918, were abortive. In June 1918 Horthy cancelled a raid using battleships of the fleet upon losing the battleship Szent István to torpedo attack by small craft.
Rather than surface action, the Central Powers increasingly relied on submarine attacks of Allied supply lines in the Mediterranean instead of surface operations. These proved costly for the Allies until late in the war when a convoy system supplemented by an anti-submarine force based in Malta contained the threat. Aiding in these efforts during 1918 were units of the United States Navy based in Gibraltar.
The Surface War in the Atlantic Ocean, Pacific Ocean, and Baltic Sea↑
While most of the surface naval warfare occurred in the North Sea, there was a series of engagements in other theaters. Like the principle contest in the North Sea, these had very little effect on the outcome of the war. The most celebrated of them occurred in the opening months of the war as the British sought to hunt down the units of Germany’s East Asian Squadron. This force, under the command of Vice Admiral Maximilian von Spee (1861-1914), consisted of two armored cruisers and three light cruisers. Upon the outbreak of the war, Spee elected to steam towards the western coast of South America with the goal of returning to Germany. British efforts to hunt him down led to the 1 November 1914 Battle of Coronel. The Germans defeated a weaker British force with no consequent loss. A further engagement, being the 8 December 1914 Battle of the Falklands Islands, resulted in the destruction of Spee’s force by British battle cruisers. The British also hunted down during 1914 and the first half of 1915 the few German light cruisers still at sea. The most notable of these was the SMS Emden, lost in November 1914, which Spee had detached from his force in order to raid Allied commerce.
The Pacific theater exited by the German East Asia Squadron was dominated by operations of the Japanese against German territorial holdings since Japan declared war against Germany on 23 August 1914 as an Allied power. In December 1914 the Japanese conducted an amphibious assault that captured the German naval base of Qingdao on the Chinese mainland. By this time the Japanese had also seized all German held islands in the Pacific that were north of the equator. Throughout the remainder of the conflict the Japanese navy was dedicated to policing Allied lines of communication in the Pacific.
Naval operations in the Baltic Sea were more important than those in the Pacific as the theater was extremely important to Germany. Control of the Baltic allowed for a supply of iron ore from Sweden as well as denying a supply route to Russia. The Russian Baltic fleet did little to affect the course of the war at sea. The Russians dedicated their resources to the protection of the Gulf of Finland and their own coastline to protect against any German amphibious assaults. The situation in the Baltic was one of stalemate until early 1917 when the Germans endeavored to secure the islands in the Baltic as a precursor to an assault on St. Petersburg. While the Germans succeeded in the capture of the islands, the amphibious assault on St. Petersburg never materialized as on 7 November 1917 the Bolsheviks seized power and declared their intention to withdraw Russia from the war.
The Submarine War: 1914-1918↑
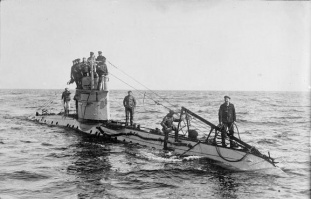
The use of submarines against Allied commerce was a key element of the war at sea, although the German use of this relatively new type of warship in this capacity was not envisioned before the conflict. In August 1914, Germany possessed only thirty-one operational U-boats and viewed them as mostly for reconnaissance, although their power versus warships became evident on 22 September 1914 when U-9 sank three British cruisers off the coast of the Netherlands.
The growing perception by German naval officials that German naval strategy was a failure in wresting command of the sea from Britain led to calls to employ submarines to attack and sink all commercial shipping, whether British or neutral, in the area of the British Isles in the hope of crushing Britain’s war effort and thus undermining that of France. This call led on 4 February 1915 to a German declaration of a counter-blockade of submarines to Britain’s distant blockade. Berlin declared that the waters around Great Britain and Ireland, including the English Channel and the western portion of the North Sea, were a war zone. Any vessel entering this zone was subject to destruction as part of an unrestricted submarine warfare campaign, meaning that ships could be sunk without warning to their passengers and crew.
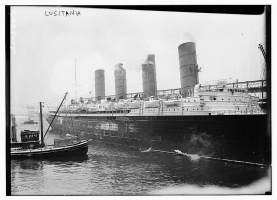
Diplomatic protests by neutral powers, particularly the United States, led to some restrictions on attacks versus neutral vessels. Even so, while Germany only possessed an operational force of twenty-five U-boats upon the declaration, these limited resources clearly demonstrated the potential of submarines used in commerce war. Between March and May 1915, German submarines sank 115 merchant vessels for the loss of only five craft in an atmosphere where there were limited anti-submarine measures.[1] Despite the restrictions placed on attacks versus neutral vessels, the unrestricted submarine warfare campaign was problematic for Germany since it led to a host of diplomatic protests from neutrals. These included most notably the United States. The potential for a diplomatic disaster was starkly revealed on 7 May 1915 with the sinking of the passenger liner Lusitania by U-20 with the loss of approximately 1.200 passengers and crew. Among the dead were 128 Americans. The sinking of the Lusitania combined with those of the British liner Arabic and American liner Hesperian in August and September led on 18 September 1915 to the end of the unrestricted submarine campaign. In its place was a restricted campaign that entailed the practice of warning merchant crews before the sinking of their vessels. A return to unrestricted submarine warfare against armed merchant vessels on 29 February 1916 ended similarly when on 24 March a German submarine sank the steamer Sussex with the loss of additional American lives. In response to a warning from United States President Woodrow Wilson (1856-1924) that any further incident would lead to ending diplomatic relations, the Germans on 24 April once again suspended unrestricted submarine warfare.
Nevertheless, both forms of submarine warfare exacted a heavy toll on shipping. British losses for the first half of 1916 alone approached 500,000 gross tons and this was more than could be replaced by new construction.[2] Much of the damage to Allied shipping came from losses in the Mediterranean Sea rather than the North Sea or Atlantic Ocean approaches to Britain. The damage inflicted came at little cost to the Germans. By the opening of 1917, the German Navy had lost only forty-six submarines since the beginning of hostilities.
Despite the success of the campaign, the Germans believed that the restricted submarine campaign was not sufficient to force Britain from the war. This estimation led to the renewal of unrestricted submarine warfare, for the first time during the war being completely unrestricted, on 1 February 1917 amidst the declining fortunes of the Central Powers on land. While the Germans recognized the risk of the United States declaring war on Germany as a result, the High Command believed that Britain could be brought to heel within a couple of months before the United States could affect the course of the war.
This calculation proved gravely mistaken as the United States, upon its declaration of war on 6 April 1917, undermined the German submarine campaign as part of its war effort. Vice Admiral William Sims (1858-1936), the commander of American naval forces in European waters, lobbied for the institution of a convoy system to decrease shipping losses. This call led to implementation of the system in May 1917 with an increasing number of the escorts being American destroyers. Shipping losses gradually decreased from their peak of 881,027 gross tons in April 1917 to 118,559 gross tons in October 1918, being the last full month of hostilities.[3] The convoy system was responsible in part for this, but contributing were advances in anti-submarine warfare including the introduction of the depth charge in 1916 and the use of airplanes for reconnaissance by the end of the war. Not only did shipping losses decrease, but the number of German submarine losses rose. The German submarine campaign against the Allies consequently failed with disastrous results. Not only did it not force Great Britain from the war, it also led to the entry of the United States into the conflict.
Great Britain’s Economic Blockade of Germany, August 1914-June 1919↑
A key portion of the naval war, along with the submarine campaign waged by Germany, was the British blockade to damage Germany’s economy and consequently its war effort. The naval blockade was a key factor in the defeat of Germany in World War I. Its potential, however, was in question in the pre-war years. One problem was that naval officials did not have faith in the traditional, close blockade of an enemy’s shores due to technological innovations like the torpedo. A blockaded nation might be able to break a close blockade through the use of small ships armed with these weapons. Also, improved coastal artillery, mines, and submarines could destroy blockaders. Another problem was posed by international law that protected neutral rights at sea. By 1914, these laws undermined the British Royal Navy’s traditional weapon of blockade. While Britain could seize all merchant ships sailing through the North Sea for Germany, naval strategists noted that neutral commerce, even in contraband items (being those goods deemed to have a military value), would continue unchecked to those countries contiguous to Germany. In terms of this trade, the onus of proof of destination rested with Britain rather than the neutral. Germany could import contraband supplies from these countries and thus undermine the whole effort.
The British had not resolved these problems on the outbreak of World War I. Even so, they implemented a blockade since naval officials still attached some importance to it. The blockade was conducted in two theaters: the Mediterranean Sea and the North Sea. In the Mediterranean, a British squadron stationed at Gibraltar monitored commerce with the aid of the French Navy. These activities, however, pale in comparison to those in the North Sea, which was the principle theater for the blockade. On 5 November 1914, the Admiralty declared the entire North Sea a war zone where all ships entering into it would do so at their own risk. The blockade of the North Sea consisted of two separate forces. One was the Dover Patrol that sealed off the Dover Strait. The other, more important force was the Tenth Cruiser Squadron under the command of Rear Admiral Dudley De Chair (1864-1958). De Chair was charged with the interception of all ships trying to pass through the northern entrance to the North Sea and to send any vessels suspected of carrying contraband for Germany into a port for examination. The primary port of inspection became Kirkwall in the Orkney Islands.
The Northern Patrol, and consequently the blockade, experienced operational problems from the start that needed resolution. De Chair’s force was initially eight old cruisers that were too slow to chase down more modern ships attempting to run the blockade. Magnifying this problem was no clear definition of where this force should conduct its patrols. At first, the patrol policed an area from the north of Aberdeen, Scotland to the coast of Norway in the vicinity of Jutland. This position exposed the squadron to German submarine attack and resulted in the sinking of one cruiser on 15 October 1914. The situation of the force improved when it was withdrawn farther north to a patrol line that extended from the Shetland Islands to the coast of Norway. An additional improvement was the replacement of the old cruisers by twenty-three armed merchant cruisers in December 1914.
The efforts of the squadron, however, in 1914 and 1915 did not produce significant results. While German commerce via its own merchant ships virtually ceased, it was clear that the European neutral powers were shipping contraband goods to Germany through the use of their own ships calling at their own ports. Germany’s war effort was largely unaffected as the blockading force endured threats from mines, rough weather in the patrol area, and submarine attack. In 1915, each of these threats claimed one merchant cruiser of the squadron.
The first significant step towards a tighter blockade came in early 1916 when the British government created the Ministry of Blockade. This administrative body produced new blockade legislation. It was an effort that strengthened enormously after 6 April 1917 when the United States, the greatest neutral power that had opposed the blockade and sent supplies to the European neutral powers, entered the war on the side of the Entente. These two events in combination produced a much more effective blockade in spite of the fact that many of the policies of the Ministry of Blockade, such as rationing the European neutrals, contravened international law. Nevertheless, by the end of 1917, the German civilian sector was on the point of collapse and the army was undersupplied due to the great decrease in supplies getting through the blockade. A key problem by the end of the war was the decline in foodstuffs. The production of many other materials of war, while they remained close to their peacetime levels, proved insufficient for a protracted war effort.
On 8 December 1917 the Tenth Cruiser Squadron was abolished and its remaining ships assigned to convoy duty. The squadron had intercepted and boarded 12,979 vessels at sea and failed to prevent 642 ships from breaking the blockade. This record came at a cost of nine ships and the loss of 1,165 officers and men. In March 1918 a giant minefield, the Northern Barrage, replaced the squadron.
By this point, however, the blockade was purely a diplomatic endeavor since the entry of the United States into the war sealed the greatest leak to the European neutrals. While historians continue to debate the degree of impact that the blockade had on the German civilian sector, particularly in the matter of fatalities from starvation, and the German war effort overall, the blockade certainly brought economic hardship and widespread unrest within Germany that was a contributing factor in its decision to sue for peace. It was discontinued on 12 July 1919 when the Allied powers received word that the German government had ratified the Treaty of Versailles.
Conclusion↑
The naval war of World War I proved largely a disappointment to officials on both sides as it did not produce the decisive fleet actions envisioned in the pre-war years. Nevertheless, the war at sea was a crucial part of World War I overall. The German use of the submarine against commerce not only threatened the Allied war effort, but also drew the United States into the conflict. In addition, the British economic blockade of Germany afforded by the Royal Navy’s command of the sea inflicted great damage on the war effort of Germany. Finally, the naval war held great ramifications for the future since many practices employed in the First World War were those pursued in the Second World War.
Eric William Osborne, Virginia Military Institute
Section Editors: Michael Neiberg; Sophie De Schaepdrijver
Notes
Selected Bibliography
- Campbell, N. J. M.: Jutland. An analysis of the fighting, Annapolis 1986: Naval Institute Press.
- Coletta, Paolo Enrico: Sea power in the Atlantic and Mediterranean in World War I, Lanham 1989: University Press of America.
- Compton-Hall, Richard: Submarines and the war at sea, 1914-18, London 1991: Macmillan.
- Goldrick, James: The king's ships were at sea. The war in the North Sea, August 1914-February 1915, Annapolis 1984: Naval Institute Press.
- Halpern, Paul G.: A naval history of World War I, Annapolis 1994: Naval Institute Press.
- Herwig, Holger H.: 'Luxury fleet'. The imperial German navy, 1888-1918, London; Boston 1980: Allen & Unwin.
- Hough, Richard: The Great War at sea, 1914-1918, Oxford; New York 1983: Oxford University Press.
- Massie, Robert K.: Castles of steel. Britain, Germany, and the winning of the Great War at sea, New York 2003: Random House.
- Osborne, Eric W.: Britain's economic blockade of Germany, 1914-1919, London; New York 2004: Frank Cass.
- Schröder, Joachim: Die U-Boote des Kaisers. Die Geschichte des deutschen U-Boot-Krieges gegen Grossbritannien im Ersten Weltkrieg, Lauf 2000: Europaforum.
- Spector, Ronald H.: At war, at sea. Sailors and naval combat in the twentieth century, New York 2001: Viking.


