Introduction↑
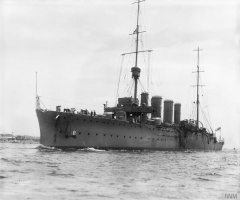
The First World War was the first large-scale conflict to which Australia sent military forces in great numbers. Australia’s largest and most significant contribution to fighting the war was in the form of land forces. Australia did possess a navy, which was placed under the Admiralty’s control on the outbreak of war, and developed air power in the form of the Australian Flying Corps during the war. However, it was on land that the Australian contribution was greatest.
The story of Australian warfare in the First World War is that of a British dominion successfully providing one part of the British Empire’s war effort. Australia entered the war through its links with Great Britain, and the command, organisation, equipment and doctrine of both Australian and British military forces was at times indistinguishable.
The Australian Imperial Force↑
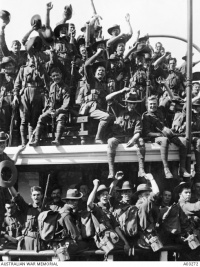
Although the Defence Act 1903 prohibited elements of the Australian military’s active service overseas, there was provision for independent expeditionary forces to be raised if required. At the outset of the war a small force, the Australian Naval and Military Expeditionary Force (AN&MEF), was sent to capture German settlements in New Guinea in September 1914. The much larger Australian Imperial Force (AIF) was intended to serve alongside the British army in Europe. This force was raised and commanded by Major-General William Bridges (1861-1915), the Inspector-General of the army and formerly commandant of the Royal Military College Duntroon.
By the end of October 1914 four infantry brigades and a mounted brigade had been raised, as well as support units such as artillery, engineers, medical and supply corps. They were the first in what was an ongoing stream of Australians leaving to serve with the AIF. At its height in 1917, the AIF constituted five divisions in France with a sixth being raised in the UK and substantial elements of two mounted divisions in the Middle East. An administrative headquarters was established in London, along with numerous bases, depots and training battalions in the UK and France to facilitate the flow of reinforcements into the fighting divisions.
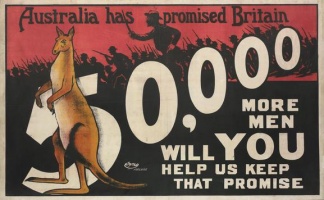
Due to failed plebiscites in 1916 and 1917 on the question of conscription, the AIF remained an all-volunteer force throughout the war.[1] It was not the sole military force of this type in the war nor is there much evidence that it was more effective because of its volunteer status.[2] In fact, without conscription it became more difficult to maintain combat units. Plans for a sixth division were scrapped in 1917 and throughout 1918 selected infantry battalions were disbanded in order to keep the remainder at fighting strength.
The AIF drew its manpower from a population of approximately 4 million people, where over half the eligible white male population enlisted, 80 percent of which served overseas. A majority of those who served did so in a combat role: over 210,000 men served in the infantry and over 30,000 in the light horse, not to mention the other smaller combat arms.[3] This made the AIF different from other armies that needed to devote substantial numbers of men to rear areas and logistics; for this support the AIF relied on Britain.
Indeed, Australian soldiers were placed under the overall control of the British Empire, and this defined the way they waged war. British authorities determined where they were sent and for what purpose. Australia had no control over strategic direction (that was controlled from London) and, until Australian officers started to command corps, Australians had little control at the operational level. It was at the tactical level where the AIF had its greatest (and for a long time only) influence in the war.[4]
Gallipoli↑
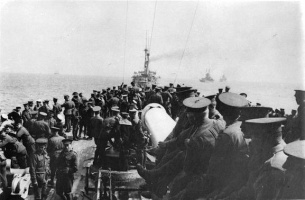
The first AIF troops left Australia in November 1914 and arrived in Egypt in December where the Australian and New Zealand Army Corps (ANZAC) was formed when the Australian Division and the New Zealand and Australian Division were placed under the command of British Lieutenant-General William Birdwood (1865-1951). With the entry of the Ottoman Empire into the war, Australian troops were first deployed to Gallipoli as part of the Mediterranean Expeditionary Force (MEF) under the command of General Sir Ian Hamilton (1853-1947).
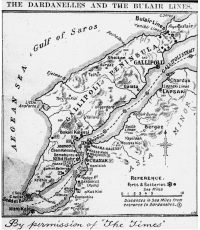
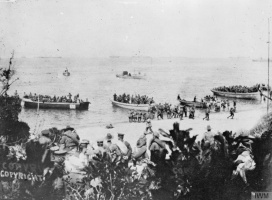
After the failure of the naval effort to secure the Dardanelles Strait, the MEF was required to land on the Gallipoli Peninsula. On 25 April 1915 ANZAC made an amphibious landing north of the main Anglo-French landing at Cape Helles. Despite the individual bravery and tenacity of many Australian soldiers, poor training and command, coupled with staff, administrative and supply issues led to a disorganised and ineffective military action.[5] Australian troops created a beachhead but failed to push inland. After four days of intense fighting ANZAC troops dug into their positions and formed a trench system similar to the Western Front. Although the Australians were able to hold these positions against Turkish counter-attacks, wounds and illness diminished the AIF’s fighting strength. One casualty was Bridges, who was shot by a sniper on 15 May and died three days later. Birdwood was appointed as the General Officer Commanding (GOC) AIF, a position he held for much of the remainder of the war.
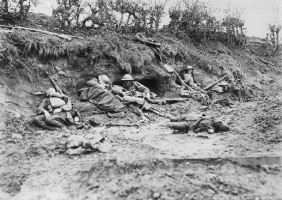
Tactical developments during the campaign were slow. At the start of the campaign, the Australian units derived their combat power from the rifles of infantrymen and little else.[6] Although Australian soldiers were exposed to hand grenades (known universally as “bombs”) which became a favored weapon of Australian soldiers, the fighting on Gallipoli involved, for the most part, basic doctrine and lacked heavy fire-support.[7] Australians were neither trained nor equipped for trench warfare and mostly had to rely natural ability, courage and determination, which were usually poor substitutes for modern weapons and tactics.[8]
By summer the campaign had stalled and an offensive was planned for August. The MEF would breakout from their beachheads by landing the British IX Corps at Suvla Bay, north of Anzac Cove. ANZAC’s part in the August Offensive was twofold: providing a series of feints south of the landing to hold Turkish troops commencing on 6 August, including at Lone Pine and The Nek, and to capture the heights of Sari Bair on IX Corps’ southern flank. Although 1st Australian Division’s assault on Lone Pine was tactically successful, it did little to redeem the rest of the offensive, which comprehensively failed and never approached success.[9] With this failure it was clear that the Gallipoli campaign was becoming untenable. Hamilton was removed in October and the MEF’s new commander, Lieutenant-General Sir Charles Monro (1860-1929), recommended withdrawing from the peninsula. This was carried out and all Australian troops were removed by 20 December.
The Middle East↑
Despite withdrawing from the Dardanelles, Australian involvement in the war against the Ottoman Empire continued, primarily through light horse units in the Sinai and Palestine where the low force-to-space ratio meant that there was still a role for mounted troops in modern warfare. On 10 March 1916 the Egyptian Expeditionary Force (EEF) was formed under General Sir Archibald Murray (1860-1945), which included the Anzac Mounted Division under Major-General Harry Chauvel (1865-1945).
Initially the EEF advanced into the Sinai as a form of forward defence, limiting the Turkish ability to strike at the Suez Canal. Australian light horse operated east of the canal sending out reconnaissance parties, raids and patrols.[10] By May the Anzac Mounted Division had reached Romani and begun to fortify its position, halting the final Ottoman assault on the Canal from 3-5 August. In December the German and Turkish forces had been pushed back across the Sinai as Australians helped to capture Magdhaba on 23 December 1916 and Rafa on 9 January 1917. With the Suez Canal Zone secured, the EEF could commence an offensive into Palestine.
After some minor operations at the start of 1917, by March the EEF reached Gaza. Australian troops fought in the first two failed attempts to break through the fortified Turkish coastal positions on 26 March and 17-19 April. By the third attempt, Murray had been removed and replaced with General Edmund Allenby (1861-1936). The new GOC brought a new plan: a flanking assault to break the Gaza defensive line by attacking the town of Beersheba, the eastern end of the Turkish line. On 31 October the town was encircled, until the 4th Light Horse Brigade delivered the coup de grâce with a mounted charge that captured Beersheba.[11] With the Gaza line breached, the EEF fought a methodical advance northward, entering Jerusalem in December. By this time the composition of Australian mounted troops in the EEF had changed. The Anzac Mounted Division was joined by the Australian Mounted Division, and together with the British Yeomanry Division and the Imperial Camel Corps Brigade formed the Desert Mounted Corps under Chauvel’s command.
At the start of 1918 Allenby deployed Australian and New Zealand mounted troops eastward in two separate Transjordan raids, neither of which achieved success. Over the summer the Desert Mounted Corps rested and reorganised in the Jordan Valley for the final offensive in Palestine. The Battle of Megiddo commenced on 19 September with the EEF breaking open the Turkish lines in the west, allowing cavalry, including the Australian Mounted Division, to penetrate the Turkish positions and swing to the east and attempt to trap the remaining Turkish troops. Concurrently the Anzac Mounted Division pressed the eastern Turkish position and captured Amman on 25 September, the same day as the Australian Mounted Division reached Lake Tiberias.[12] The EEF exploited the victory and pushed northward, capturing Damascus. On 30 October, as the Australian Mounted Division was moving towards Aleppo, the announcement that the Ottoman Empire had signed an armistice ended Australian combat operations in that theatre.
Australian light horse began fighting as mounted infantry and as the primary striking arm of the EEF, but moved into more of a cavalry role within an all-arms force, a role that Australian and other mounted units executed effectively and successfully.[13] Although their contribution to the EEF diminished during 1917 in favor of infantry as the preferred strike force, light horse nevertheless were important in mobile operations, creating a different operational experience to the Western Front.[14]
The Western Front↑
1916↑
At the conclusion of the Gallipoli campaign the AIF returned to Egypt for reorganisation and retaining. There the AIF expanded to four Australian divisions (1st, 2nd, 4th and 5th) while a separate New Zealand Division was formed. These formations also became more powerful: they received heavier artillery; infantry battalions’ Vickers machine guns were consolidated into machine gun battalions; and infantry was given lighter and more mobile Lewis Guns.[15] The four Australian divisions and the New Zealand Division were distributed to two different corps: Birdwood took command of I Anzac Corps and II Anzac Corps was given to Lieutenant-General Alexander Godley (1867-1957). Together, they headed to the Western Front.
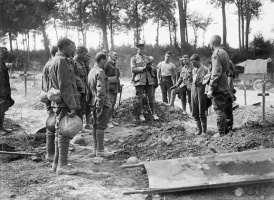
In France Australian divisions served with the British Expeditionary Force (BEF) under Field Marshal Douglas Haig (1861-1928), fighting in the manner prescribed by British doctrine: an evolving method of limited objective, set-piece operations. The development of the AIF on the Western Front was indexed to the “learning process” of the BEF as a whole and cannot be divorced from it. The Australians’ first significant action was at Fromelles on 19 July 1916, where the 5th Australian Division and British 61st (2nd South Midland) Division made a trench-to-trench assault to hold German troops north of the Somme battlefield. Neither division made any significant gains and were forced to withdraw from the small footholds they captured the next morning at the cost of 5,533 Australian casualties.[16]
On the Somme the Anglo-French armies had commenced an offensive on 1 July 1916 and had been slowly grinding forward ever since. The Australian introduction to the Somme proper was on 23 July when the 1st Australian Division assaulted Pozières. For forty-two days, the 1st, 2nd and 4th Australian Divisions fought their way forward, capturing Pozières, the Pozières Heights and then pushed forward towards Mouquet Farm. Their progress stalled and by 5 September the Canadian Corps relieved the exhausted I Anzac Corps. The final Australian action of the year was a series of ineffectual attacks by 2nd Australian Division at Flers in November. At the end of the year the last Australian division, the 3rd, arrived on the Western Front. The fighting in 1916 was a bloody introduction for Australian divisions to the advanced, mechanical and brutal warfare of the Western Front.
1917↑
The first major British offensive for 1917 commenced on 9 April at Arras. The Australian involvement largely consisted of two operations at Bullecourt, south of where the British Third Army was carrying out the main effort. At the start of the year the German army had retreated to the Hindenburg Line, a pre-prepared defensive position. Australian troops had advanced in close touch with the Germans, capturing several towns and the line’s outpost villages. The first attempt at the Hindenburg Line at Bullecourt was made by the 4th Australian Division on 11 April. This was the first time Australian troops fought with tanks. Neither the assault nor the tanks succeeded. The 2nd Australian Division made the second assault at Bullecourt, which was part of a broad British attack on 3 May. This operation was carried out without tanks and the Australian troops were able to gain and hold part of the German lines.
After the completion of the Second Battle of Bullecourt the AIF went into a prolonged period of rest and training over the summer in preparation for the Third Battle of Ypres, the second major British offensive of 1917. Australian divisions took part in a preliminary operation at Messines on 7 June. It was an overwhelming success and a tour de force of the type of limited objective, set-piece operations that the British army had been developing since 1915 and for which Australian divisions had been training during the summer.[17]
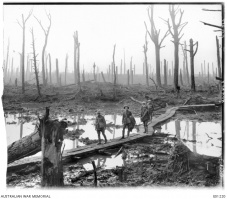
The increasingly complex infantry/artillery co-operation required for battlefield success was put to the test during the Third Battle of Ypres, which commenced on 31 July and which the AIF joined in September. Both I and II Anzac Corps fought successfully in three operations: Menin Road (20 September), Polygon Wood (26 September) and Broodseinde Ridge (4 October), reinforcing the power of artillery to bring about victory.[18] However, the weather turned poor and Poelcappelle (9 October) and the first assault on Passchendaele (12 October) were failures since sufficient artillery support could not be brought up in time. At the end of the year I Anzac Corps became the Australian Corps, consolidating all the Australian divisions under Birdwood’s command. II Anzac Corps, still under Godley, became the British XXII Corps.
1918↑
Open warfare conditions resumed in 1918 as the German Spring Offensive commenced with Operation Michael on 21 March. With German troops driving towards the vital rail junction of Amiens, the Australian Corps, north of the areas of German penetration, was rushed south to provide reinforcements and support. Bit by bit, Australian formations went into the line, plugging gaps, engaging with the advancing Germans and stalling their progress. By 4 April the Germans made one last push towards Amiens, reaching the outskirts of Villers-Bretonneux before a determined counter-offensive by the 36th Australian Infantry Battalion checked the advance. That same day the Germans again struck at Dernancourt against the 12th and 13th Australian Infantry Brigades. Both were able to hold their ground. Charles Bean described these assaults as “the strongest attack made against Australian troops in that war.”[19] With the failure to take Amiens, Erich Ludendorff (1865-1937) called off Operation Michael on 5 April.
However, on 9 April Operation Georgette commenced against Hazebrouck in the north, severely threatening the vital railway-hub upon which much of the BEF’s capacity to wage war rested.[20] On 12 April the 1st Australian Division reached Hazebrouck and defended it until 15 April, blunting the Georgette advance. Although the German effort continued in the north against the Lys, on 23 April the Germans recommenced their advance against Villers-Bretonneux, capturing it the next day. On the night of 24/25 April the 13th and 15th Australian Infantry Brigades engaged in a double-envelopment of the town and by 25 April it had been recaptured.
While the German Spring Offensives were running out of steam, Australian soldiers engaged in “peaceful penetration,” making small, impromptu advances to capture territory, slowly pushing their line forward. Minor operations at Morlancourt, Ville-sur-Ancre and Hamel pushed the allied line forward in preparation for a more sustained offensive. By this time Birdwood had left the Australian Corps to take command of the British Fifth Army and Major-General John Monash (1865-1931), commanding the 3rd Australian Division, took command, continuing a policy of “Australianising” the AIF.
A full allied counter-offensive commenced on 8 August with the Battle of Amiens. British, Australian, Canadian and French troops struck the over-extended and exhausted Germans and advanced seven miles in one day.[21] The battle, which lasted until 12 August, was the first time that all five Australian divisions fought together in the same action. After a period of consolidation, the British army recommenced the advance, with the Australian Corps pushing towards the Somme from 23 August to 3 September.[22] During this period the 2nd Australian Division was able to cross the Somme and capture the important heights at Mont St. Quentin on 1 September. By the end of September, the Australian Corps again reached the Hindenburg Line. With the German Army in retreat and the British army now fighting confidently with appropriate doctrine and effective technology the line was breached on 29 September and fully captured by 5 October.[23] The fighting at Montbrehain by the 2nd Australian Division was the last land action the AIF was involved in on the Western Front. The Australian Corps were then removed from the line to rest.
Conclusion↑
Australians in all theatres demonstrated that, by the end of the war, they had become very effective soldiers, learning how to fight a modern war as technology and tactics changed around them, although they themselves were rarely at the forefront of innovation.[24] Australian divisions sat alongside the best divisions in the British Empire, combining experienced commanders and troops with doctrine learned through years of costly warfare and, ultimately, a good supply of materiel. However, the cost for Australia was high: 215,585 casualties from 413,453 enlistments and 331,781 embarkations, percentages of 52.14 and 64.98 respectively.[25]
William Westerman, University of New South Wales
Section Editor: Peter Stanley
Notes
- ↑ Grey, Jeffrey: A Military History of Australia, third edition, Cambridge 2008, pp. 111-115.
- ↑ Connor, John: The ‘Superior’ All-Volunteer AIF, in: Stockings, Craig (ed.): Anzac’s Dirty Dozen: 12 Myths of Australian Military History, Sydney 2012, pp. 35-50.
- ↑ Grey, A Military History of Australia 2008, p. 118.
- ↑ Grey, Jeffrey: The War With the Ottoman Empire, South Melbourne 2015, pp. 2-3.
- ↑ Grey, A Military History of Australia 2008, p. 93.
- ↑ Stevenson, Robert: The 1st Australian Division in 1917: A Snapshot, in: Dennis, Peter and Grey, Jeffrey (eds.): 1917: Tactics, Training and Technology: The 2007 Chief of Army Military History Conference, Loftus 2007, p. 41.
- ↑ Pedersen, Peter A.: The AIF on the Western Front: The Role of Training and Command, in McKernan, M. and Browne, M. (eds.): Australia Two Centuries of War and Peace, Canberra 1988, p. 173.
- ↑ Ibid, p. 168.
- ↑ Crawley, Rhys: The myths of August at Gallipoli, in: Stockings, Craig (ed.): Zombie Myths of Australian Military History, Sydney 2010, p. 67.
- ↑ Bou, Jean: Light Horse: A History of Australia’s Mounted Army, Cambridge and Port Melbourne 2010, p. 154.
- ↑ Bou, Jean: Australia’s Palestine Campaign, Canberra 2010, pp. 43-52.
- ↑ Bou, Light Horse 2010, p. 195.
- ↑ Ibid, pp. 171, 197-199.
- ↑ Bou, Australia’s Palestine Campaign 2010, p. 150.
- ↑ Stevenson, Robert: To Win the Battle: The 1st Australian Division in the Great War, 1914-18, Cambridge 2013, pp. 43-47.
- ↑ Lee, Roger: The Battle of Fromelles: 1916, Canberra 2010, p. 7.
- ↑ Pedersen, Peter: The Anzacs: Gallipoli to the Western Front, Camberwell 2007, pp. 239-241.
- ↑ Stevenson, The 1st Australian Division 2007, p. 42.
- ↑ Bean, C.E.W.: Anzac to Amiens, Canberra 1983, p. 426.
- ↑ Sheffield, Gary: The Chief: Douglas Haig and the British Army, London 2011, p. 282.
- ↑ Wise, S.F.: The Black Day of the German Army: Australians and Canadians at Amiens, August 1918, in: Dennis, Peter and Grey, Jeffrey (eds.): 1918 Defining Victory: Proceedings of the Chief of Army’s History Conference held at the National Convention Centre, Canberra 29 September 1998, Canberra 1998, p. 1.
- ↑ Prior, Robin and Wilson, Trevor: Command on the Western Front: The Military Career of Sir Henry Rawlinson 1914-1918, Barnsley 2004, p. 342.
- ↑ Ibid, p. 375.
- ↑ Stevenson, Robert: The War With Germany, South Melbourne 2015, p. 211.
- ↑ Scott, Ernest: The Official History of Australia in the War of 1914-1918 Volume XI Australia During the War, seventh edition, Sydney 1941, p. 874.
Selected Bibliography
- Bean, C. E. W.: Anzac to Amiens, Canberra 1946: Australian War Memorial.
- Bou, Jean: Light Horse. A history of Australia's mounted army, Cambridge; New York 2010: Cambridge University Press.
- Bou, Jean: Australia's Palestine campaign, Canberra 2010: Army History Unit.
- Connor, John: The 'superior' all-volunteer AIF, in: Stockings, Craig A. J. (ed.): Anzac's dirty dozen. 12 myths of Australian military history, Kensington 2012: NewSouth Publishing, pp. 35-50.
- Crawley, Rhys: The myths of August at Gallipoli, in: Stockings, Craig A. J. (ed.): Zombie myths of Australian military history, Sydney 2010: University of New South Wales Press, pp. 50-69.
- Crawley, Rhys: Marching to the beat of an imperial drum. Contextualising Australia's military effort during the First World War, in: Australian Historical Studies 46/1, 2015, pp. 64-80.
- Grey, Jeffrey: A military history of Australia (3 ed.), Cambridge 2008: Cambridge University Press.
- Grey, Jeffrey: The war with the Ottoman Empire, Melbourne 2015: Oxford University Press.
- Lee, Roger: The battle of Fromelles, 1916, Canberra 2010: Army History Unit.
- Pedersen, P. A.: The AIF on the Western Front. The role of training and command, in: McKernan, M. / Browne, M. (eds.): Australia. Two centuries of war and peace, Canberra 1988: Australian War Memorial; Allen & Unwin Australia, pp. 167-193.
- Pedersen, P. A.: The Anzacs. Gallipoli to the Western Front, Camberwell; New York 2007: Viking.
- Prior, Robin: Gallipoli. The end of the myth, New Haven; London 2009: Yale University Press.
- Prior, Robin / Wilson, Trevor: Command on the Western Front. The military career of Sir Henry Rawlinson 1914-1918, Barnsley 2004: Leo Cooper.
- Scott, Ernest: Official history of Australia in the war of 1914–1918. Australia during the war, volume 11, St. Lucia 1936: University of Queensland Press.
- Sheffield, Gary: The chief. Douglas Haig and the British army, London 2011: Aurum.
- Stevenson, Robert: The 1st Australian Division in 1917. A snapshot, in: Dennis, Peter / Grey, Jeffrey (eds.): 1917. Tactics, training and technology. The 2007 chief of army's military history conference, Loftus 2007: Australian Military History Publications, pp. 23-42.
- Stevenson, Robert C.: To win the battle. The 1st Australian Division in the Great War, 1914-18, Cambridge 2013: Cambridge University Press.
- Stevenson, Robert C.: The war with Germany, Melbourne 2015: Oxford University Press.
- Wise, S. F.: The black day of the German army. Australians and Canadians at Amiens, August 1918, in: Dennis, Peter / Grey, Jeffrey (eds.): 1918 defining victory. Proceedings of the Chief of Army's History Conference held at the National Convention Centre, Canberra, 29 September 1998, Canberra 1998: Army History Unit, pp. 1-32.


